Monday, August 29, 2011

HK 450 Helicopter for sale


The heli bug bit me me last year July and I bought an HK450 to see what all the fuss with heli flying is all about. I quite keenly laboured in putting it together and…. that’s where it ended…
Apart from briefly firing it up to check blade tracking this heli has never flown!?Smile with tongue outI just don’t have the time to invest in the countless hours learning to fly it, crashing it, rebuilding it, flying it, crashing it… well you get the picture. So I’d rather part with it.

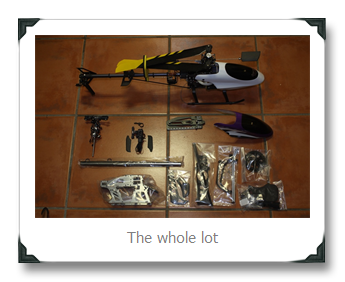
What you get is the following (click the hyperlinks to check it out on WiFly’s website):

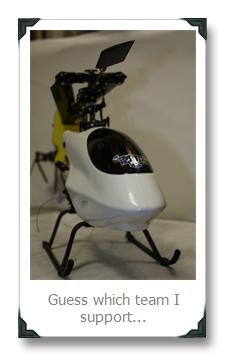
  1. Complete HK450 V2 kitted out with the following hardware
    1. 3 Hextronic HXT900 servos on the head
    2. Turnigy DS480 servo on the tail rotor
    3. Turnigy E500 6T 4000Kv 200W Heli Motor
    4. TowerPro H40A ESC
    5. Telebee/Turnigy Headlock Gyro
  2. Extras include the following:
    1. One “crash kit” (essentially a complete heli excluding the electronics)
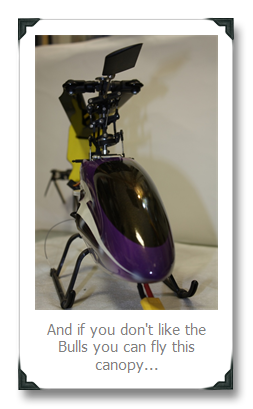
    2. Funky coloured spare canopy
    3. Spare set of fibreglass blades
    4. Spare Heli Pinion Gears 3.17mm shaft, 11t and 13t tooth
    5. Pitch gauge
  3. The instruction manual (actually a T-Rex manual, but identical)

All you need to do is fit your receiver, battery, check the setup and fly.

I paid R2,050.00 for it. Current replacement price is around R1,900.00 (go figure…).

Asking price: R1,500.00 (not negotiable, excludes postage and shipping, collection preferred, Kemptonpark). Interested buyers can phone Izak on 082 859 3453.

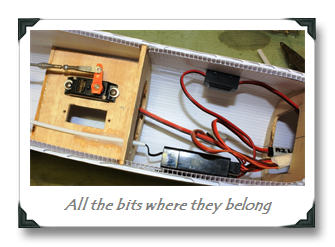
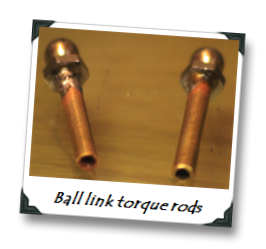
Below are some pictures.

Finally some action again

After “hibernating” for a long while since the last post, I decided to kick off with updating the Corro Mig build with some pics of the final colour scheme and some feedback on the flying.

The Mig flew very well, apart from one issue when trying to loop… It would keep rolling out of the loop when it got to the top, no matter how fast I entered the loop….? I put it down to being slightly hamfisted when folding the wing. I applied too much pressure on the top skin and managed to slightly crush the flutes which caused a pronounced triangular shaped airfoil on one half of the wing. The uneven lift distribution apart from screwing up my loops also made the Mig roll better one way than the opposite way. A new wing has been added to the extremely long (and currently dormant…Embarrassed smile) list of building projects.

There has also been two new additions to this list recently, of which the first is a 6m Nimbus 4 for which I bought a fuselage from Mike May. This one is going to be a long build but hopefully should be done by the next Sungazer event…

The second addition is a Flying Fish 60” slope racer!! Open-mouthed smile My “built-like-a-brick-outhouse” DS Toko really gets the juices flowing but only starts performing well when the wind goes 40kph+!!! The Fish is slighty smaller than the Toko but according to feedback from Herman Weber and Dave Greer is less than half the weight of my TokoSurprised smile. The chinese seems to be upping their game as the construction on this little gem looks on par with anything I’ve seen come from some big well known brands. This one will go together in a jiffy and should be ready to fly by the next slope trip, which can’t be soon enough….Fingers crossed

Friday, November 12, 2010

Corro Mig – Part 8

Yet another photo finish! These last minute slope projects are turning into a bad habit. But then I do work better under pressure...Smile

Last night was occupied with most the remaining odd tasks to finish up this model and the repairs to the GWS Corsair and Blue Angels F18.

I had to finish half a 2 litre Coke in a hurry to obtain the material for the canopy but once again I’m chuffed with the end result. Pity I didn’t have a little bust figure to occupy it.
Initially I had a black and yellow scheme in mind but previous experience with the black vinyl lifting as soon as it caught a whiff of sunlight made me settle on my signature blue and yellow. I’ll add some black trim tape for flair.

Covering the fuselage is as far as I got before I ran out of time and imagination…

Time won’t allow another build update here before this baby hits the slope but I’ll make sure to take plenty before and after pics and report back next week

May the fickle wind gods smile upon us this weekend!

Thursday, November 11, 2010

Corro Mig – Part 7

Over the past two nights I picked up the pace on the build and spent less time taking pics throughout the process.

It went something like this: finish torque rods, join wings, work on Corsair repair while waiting for glue to dry, add hard wood bearers for servos, make cutouts, install servos, make carbon push rods, check setup and throws on radio, take picture, go to sleep and come back next evening to admire handy work. The end result is very satisfactory.
If you are used to the tight spaces typical of F3J/F3B models this fuselage is simply cavernous, swallowing up all the necessary bits and pieces with plenty of room to spare. This model should be the perfect platform for an electric power plant….

Hmmm, a Turnigy Park 480 should do nicely and I see they are only R185.00 from WiFlySmile

The wing seat on the fuselage and the wing centre line join also received some doublers as reinforcement.
Next up on the to-do list was the elevator push rod. Nothing out of the ordinary here. Not being a fan of z-bends I opted for some decent clevises instead. Some wire and a 6mm dowel completed the setup.

Whilst trying to test the elevator I found the servo was dead….? I could have sworn I bought all four the GWS 2BBMG servos together but on closer inspection this one looked used and felt hot to the touch after leaving it on for a minute or so. Ah well, fortunately I won’t be needing a throttle servo….

All that remains to do now is to close up the aft fuselage bottom, balance the model and add a splash of colour. Oh, and a spinner to round off that square nose.

The spinner has already been crafted from some polystyrene. Paul Carnall suggested I try using a drill as a lathe, sticking a block of foam on a dowel and shaping it with some coarse sand paper. It worked like a charm. The secret is to use as high a speed as your drill can deliver and light pressure while sanding. And if you value the peace at home, DO IT OUTSIDE!!!

Tuesday, November 9, 2010

Corro Mig – Part 6

One would have thought after 15 years of marriage I would have learned some skills from my highly organized wife by now, especially her planning skills……!! If I did then I would have had the rights parts for last nights build i.e. the correct length bicycle spokes for the aileron torque rods.

So the bulk of last night’s available building time was spent scratching my head and eventually manufacturing my own torque rods with some wire, brass tube and ball links. The only other option would have been to mount the servos further outboard with direct push rods but I don’t like the idea sticking unwanted bits in the airflow and creating weak spots in the wings where the cut-outs for the servos would have been.

For the inboard end of the torque rods I made use of some ball links lying around which were soldered to a short section of brass tube.

The other end was soldered to the inboard 90° bend of the torque rod.

These will be connected to the servos via small pushrods.
The hardest and most delicate part of making the torque rod was putting the outboard bend in it without ripping the wing apart. This because it has to be done with the torque rod already installed and the wire I had is as hard as hell!!

This bend fits into a second piece of brass tubing that was inserted into the flutes of the aileron.

The section of torque rod inside of the wing is supported on both ends by a 25mm section of plastic tube inserted into the flute to take up the slop. In the end I was extremely satisfied as the whole setup resulted in ZERO slop on the ailerons.

The two servo slots in the servo tray and the plan’s lack of indicating the rudder position had me puzzled once more. After speaking to my “consulting engineer” on the project, Gert Nieuwoudt :), I decided to not add a rudder on the model as it would only complicate matters of where to route and exit the push rod for the rudder, possibly weakening the fin and as Gert pointed out the model has a very short tail so the rudder would probably not have been as effective as I would have liked. Only after our conversation it dawned on me again that as this model was originally designed as a power combat plane the second servo position in the tray was for the throttle…… DOH!

Monday, November 8, 2010

Corro Mig – Part 5

Although I didn’t get as far as I had hoped I would over the weekend, the Mig has progressed quite nicely. I’m running out of time though as there are still two other models that need some reconstructive surgery before the weekend…. And the trusty old Zagi is still naked after I had stripped it of its tattered pajamas.

IMG_7780

Putting the tailfeathers together is straight forward and the only deviation from the plans was to add the balsa triangle stock to keep everything square and give the glue more surface area to take on

The formers have been glued in here and the fuselage sides pulled in. Masking tape holds everything in place while the contact glue takes time to take hold. I still found the ends of the correx was lifting afterwards and tacked them in place with cyano.

IMG_7772
IMG_7817

The original plans are for a gas model and had this cut-out up front to allow for engine installation. I blindly traced and cut the template and only afterwards realised that it isn’t required. So I decided to utilize it as the battery bay and made a little cover for it. Makes for a convenient location for lead should I need to add any to adjust the CG

Here the spar has been glued to the bottom of the wing. The leading edge fold needs to be creased only (not cut) and when the wife wasn’t looking I nicked her rotary pizza cutter for the job… Smile

Worked a charm!

IMG_7819
IMG_7822IMG_7825

And who can resist the mockup when the parts start taking shape?

Smile

The servos installed and the tray in position. There is a LOT of space in this fuselage… Next to go in are the push rods, switch harness and receiver.IMG_7831

Friday, November 5, 2010

Corro Mig – Part 4

IMG_7757Part four got underway night before last but about 10 minutes in to my soul cleansing activities our dear Eskom decided that it’s bed time for me F#&$%!!!. Working in the proximity to sharp tools by candle light didn't appeal to me.
I managed to find some 8x3mm spruce (very scarce to find) and a sheet of 6mm AAA grade balsa from Airborne Passion at a princely sum. I must admit that at least it is very good quality wood, not the usual crooked and wavy stuff some hobby shops stock.
The shear webs were made by gluing 35mm strips of cross grain balsa end to end and then cutting the tapered profiles from this strip.
The spruce was glued with polyurethane wood glue and clamped to prevent distortion. Formers F5A & B were then glued in position on F5 as per the instructions.
Next up will be the making of the dihedral braces and I should be ready to start assembly then.

I’m starting to think I may have to sacrifice my flying this weekend just to be sure the project is completed on time. Rather safe than sorry Smile